|
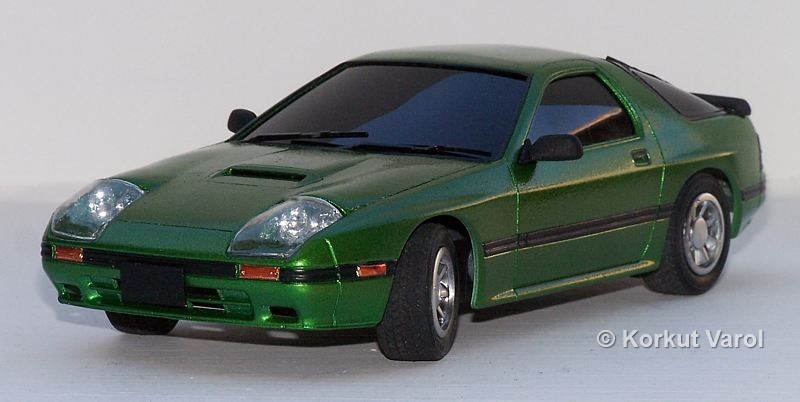
Mazda
Savanna Custom
|
 |
.
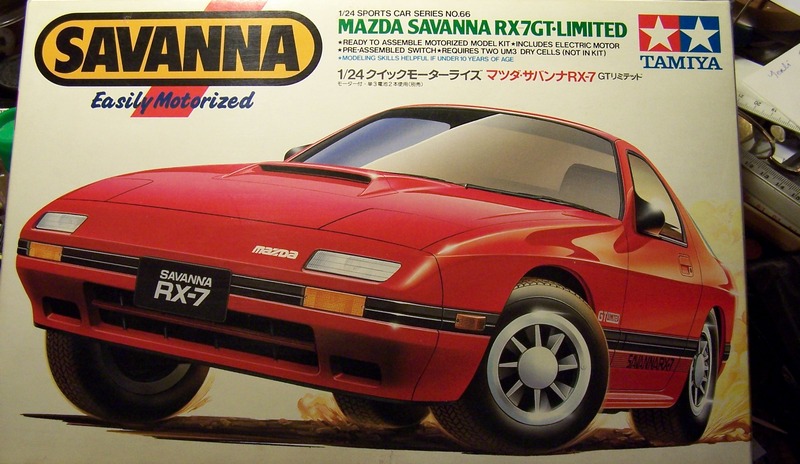
Scale: 1/24
Manufacturer: Tamiya
Kit No: 24066
Construction: Concept, with scratchbuilt parts
.
Started:
31 August 2006
Finished:
20 January 2007
31
August 2006:
This model originally
is a motorized one and naturally lacking in detail with its
interiors.
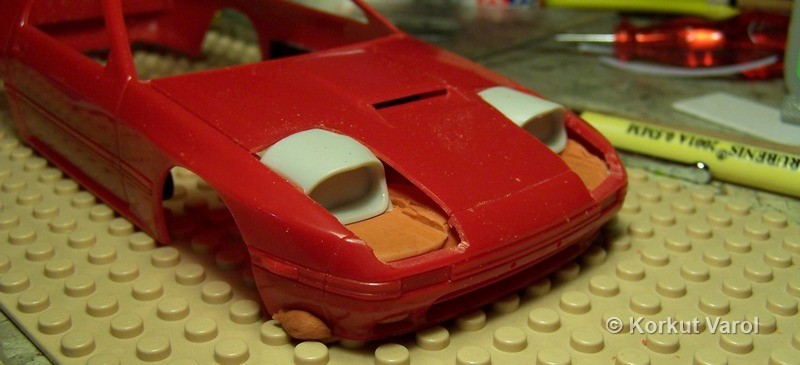
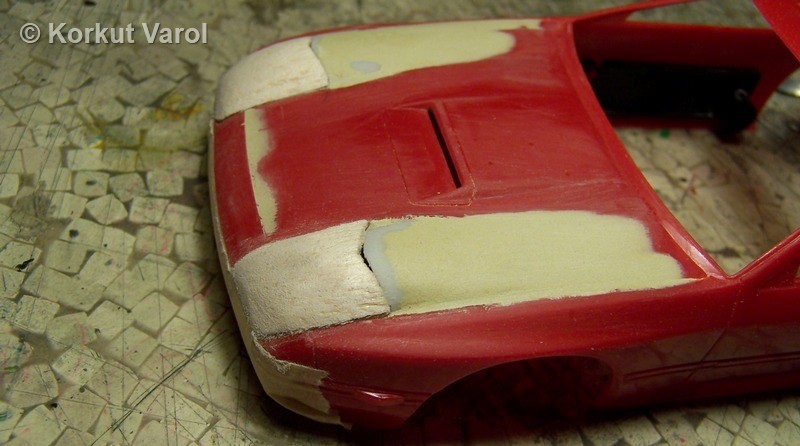
I decided to make some quick customizing job, and a slammer out of it.
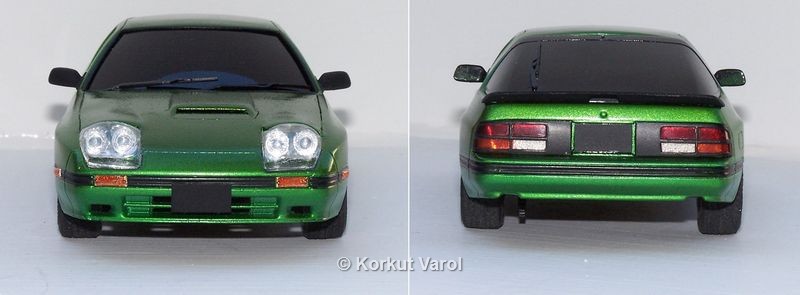
Checking
my parts box, I found the
front custom end for the 49 Ford with twin headlights. I figured that I
could embed the headlamps.
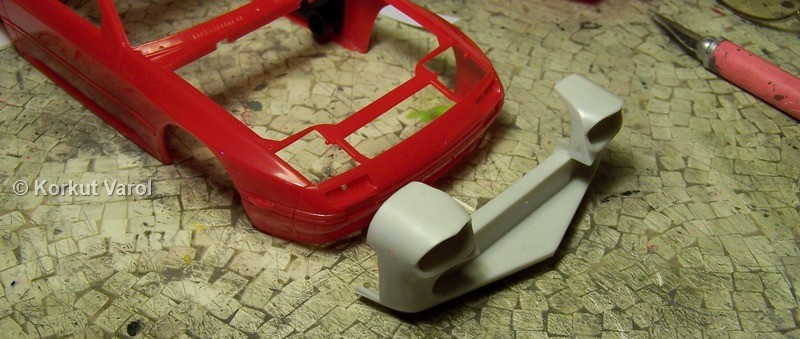
I
cut out the places to embed the headlamps.
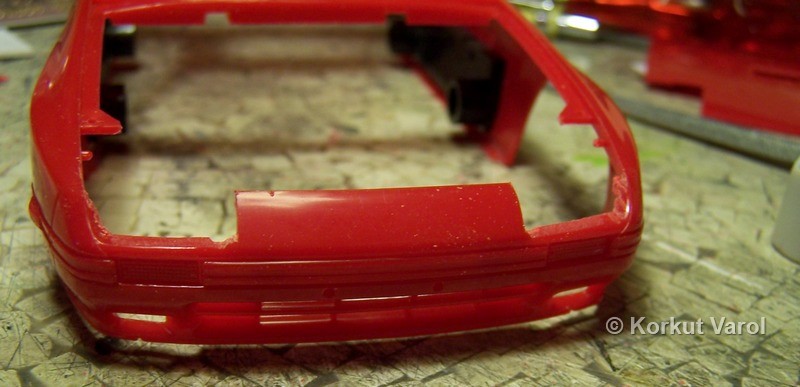
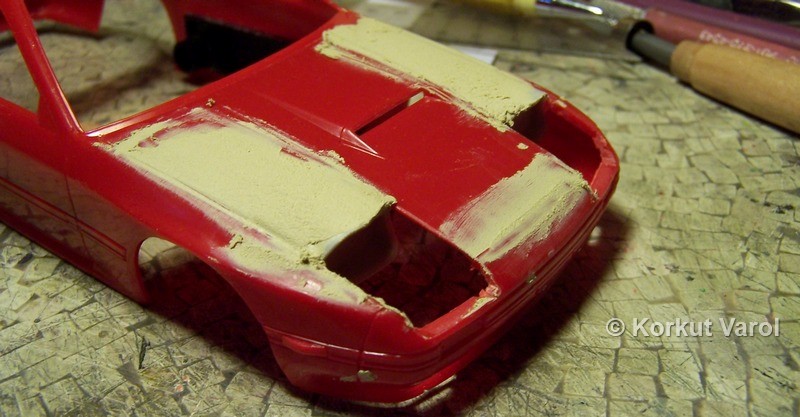
I
cut the headlamp housings from the
front end and aligned them on a non-drying putty. Then I applied glue
and
fixed them in place, and removed the putty.
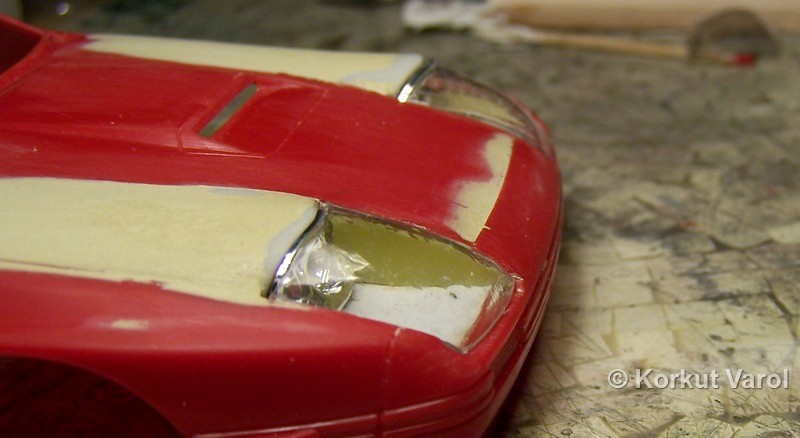
02 September
2006:
Then I applied
automotive steel putty to join the tips of the headlight housings with
the end of the hood.
04 September
2006:
I sanded the
headlamp area and tailored styrene pieces in front of the housings.
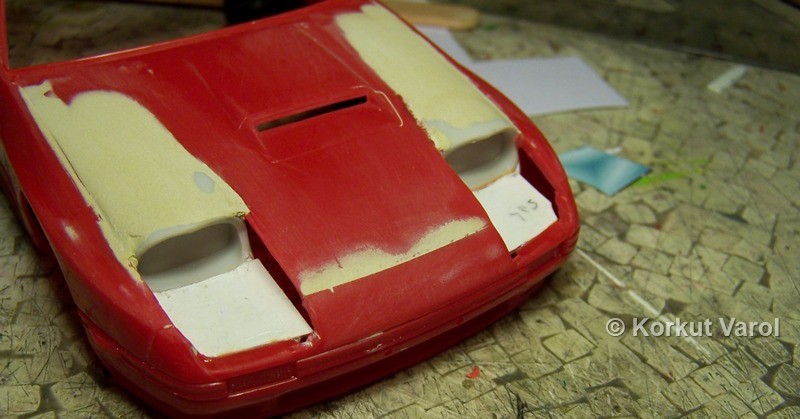
I
treated the sides of the headlamp
recess thus formed with putty and test-fitted the headlamps in place.
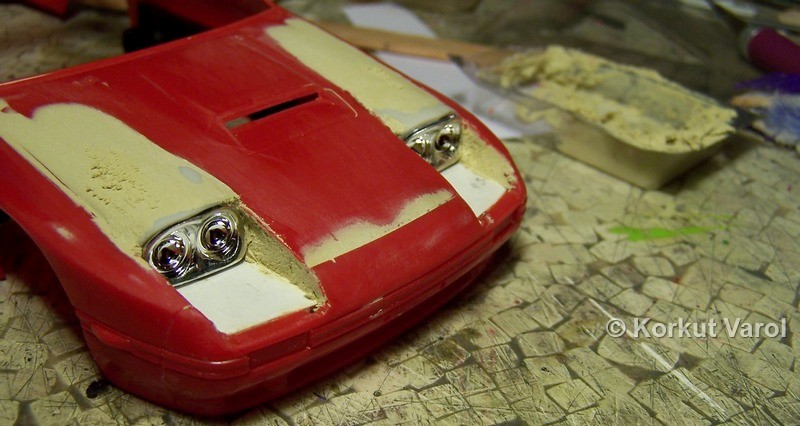
29 October
2006:
I carved the
blocks to be the masters for the dies of the headlamp glasses, from
balsa
block.
I
prepared a female die from a dentists'
mold material, by using the balsa blocks. Then I made the males by
filling
the female mold with polyester putty, meanwhile inserting a screw while
it cured. The screw served for the handle to push and form the heated
acetate.
At the right of the male, the formed and trimmed acetate is shown.

02 November
2006:
I formed and
trimmed two acetate glasses for the headlamps.
13 January
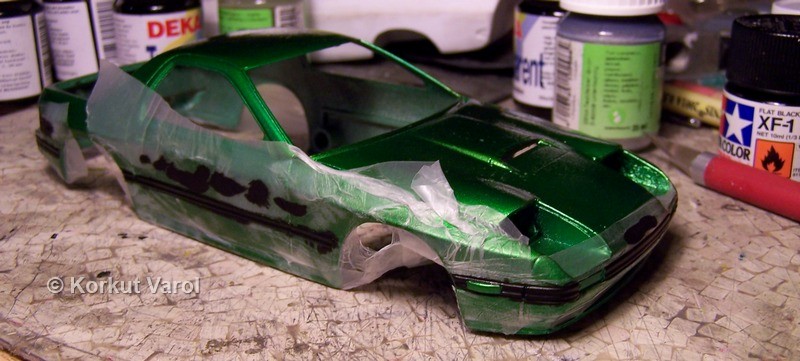
2006:
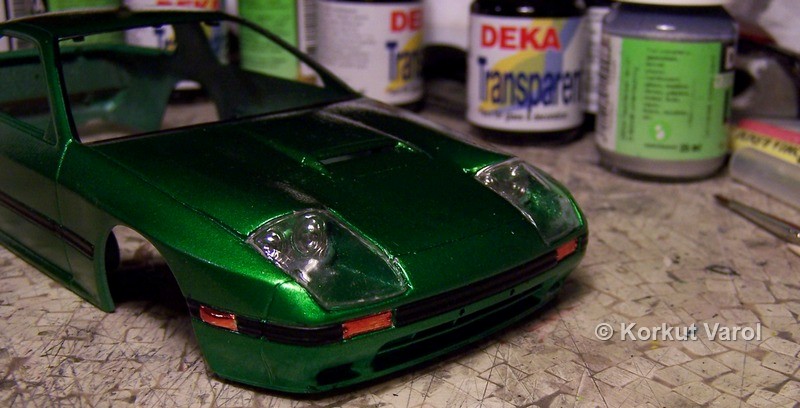
The painting
had many ill-fates. The car went to the hydraulic stripping bath a few
times, and in the end, I managed to apply a custom made tone. I applied
silver as the base, then Gunze's transparent green, and finally Gunze's
transparent yellow as the final layer. However, due to former
ill-paintjobs,
the surface had lost its quality and the paint had the orange-peel
effect.
I masked the
body with parafilm to paint the rubber protectors.
14 January
2006:
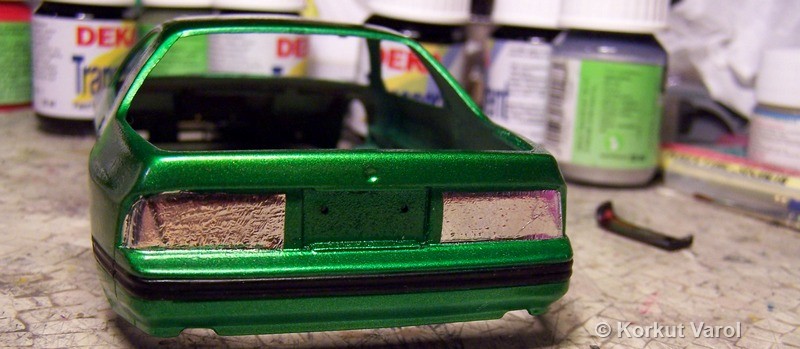
The rear lamps
were a bit tricky to paint. I applied BMF on the outside, where the
clear
parts are; and painted flat black. Then I stripped the BMF masks to
reveal
the clear lenses again. I painted the lenses on the inside with clear
orange
and red.
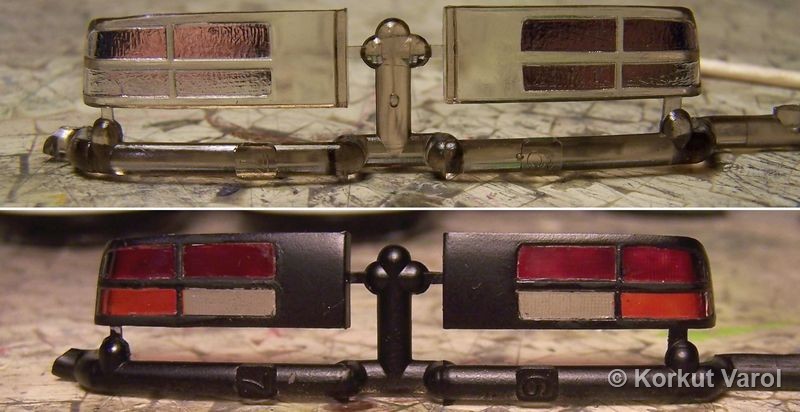
I
applied BMF on the side and front
signal lamps and painted over with clear orange. Then I installed the
headlamp
assemblies with Testors Clear Parts Cement.
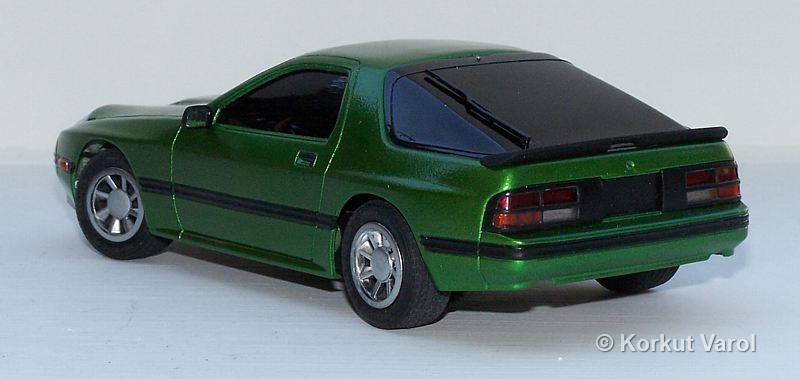
For
a better reflection, I covered
the internal rear lamp area with BMF. I applied clear dark brown paint
on the insides of the glasses to finish the slammer job...
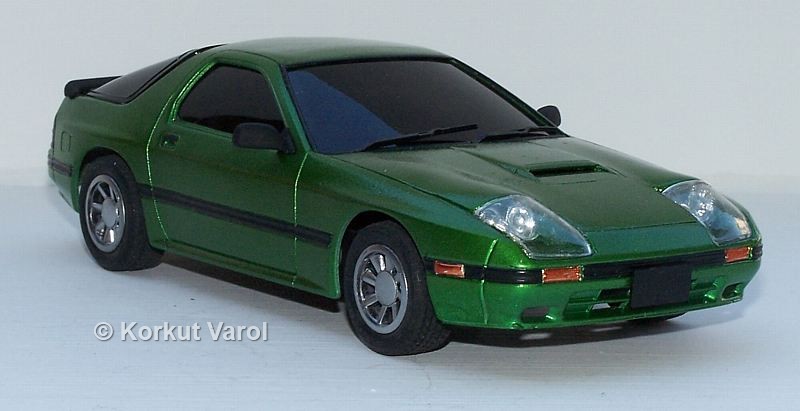
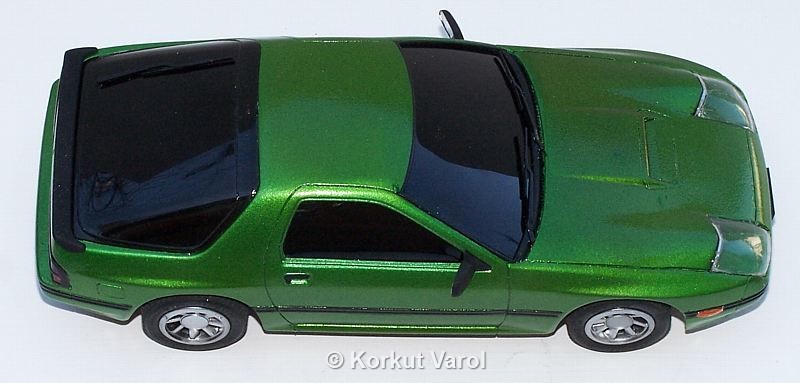
And
the finished photos... I am
pleased with the color tone but not with the painting quality at all.
After
many ill-faiths during painting, the surface had an orange-peel effect
that at last, I left it as it is... Anyhow, this was a exercising
project
for the headlamp area remanufacturing...