 |
"Çiçek Abbas" |
|
 |
|
"Çiçek Abbas" |
|
|
Scale : 1/24
Start: 22
October 2016
Finish: 20
February 2017
Page 1 / 5
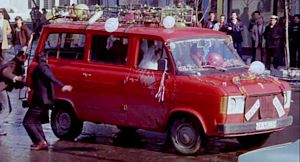
| The
model of the Ford Transit public transport minibus that appeared in the
Turkish film "Çiçek Abbas" (1982). The kit I used is the facelift of Transit Mk.2; moreover, it is a van and not a minibus, so a great deal of modifications will have to be made. The kit is a reissue of the old ESCI kit, and I had to wait till it was available. 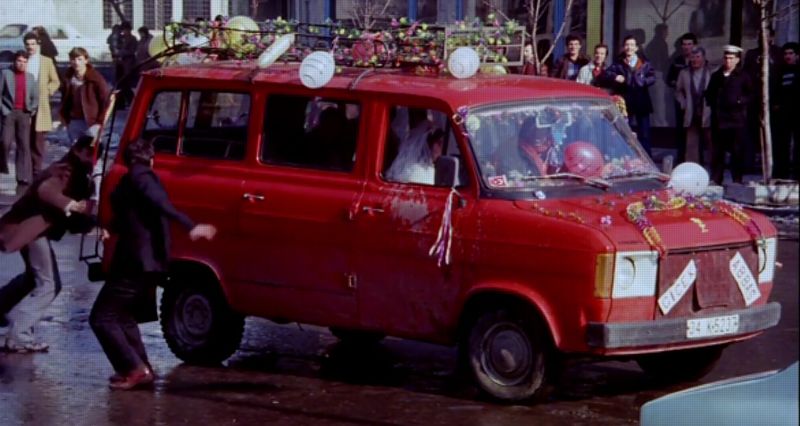
|
|
22 October
2016:
While waiting for the kit, I began exercising with the manufacturing of various accessories that will consume time in the future. I made a balloon from wood and took mold of silicone. 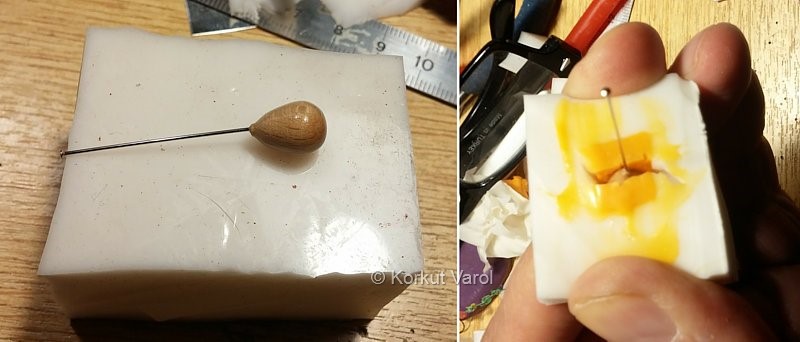 |
|
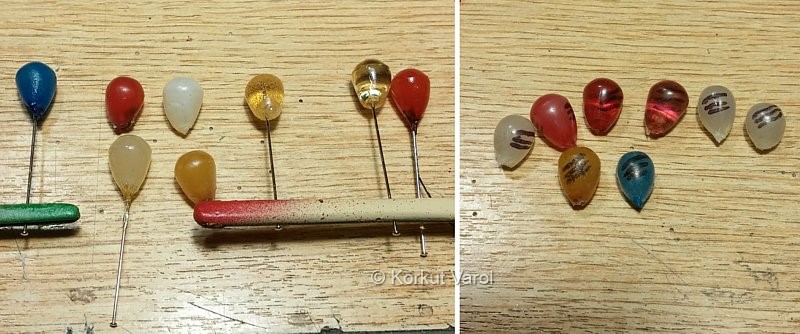
I
cast parts from various materials like hot melt glue, EZ-water, 100
layers varnish. The best outcome was from hot melt glue. I
dipped
the balloon in clear glass paint and after drying, I drew stripes and
covered the whole with stretched parafilm.
 |
|
23 October
2016:
Exercise for the flowers around the roof luggage carrier. I drilled a cavity within a silicone piece, naturally an irregular one depending on the tearing of the silicone. Then I injected hot melt glue in the cavity and before cooling, I pressed a piece of thread to fix the flower on. 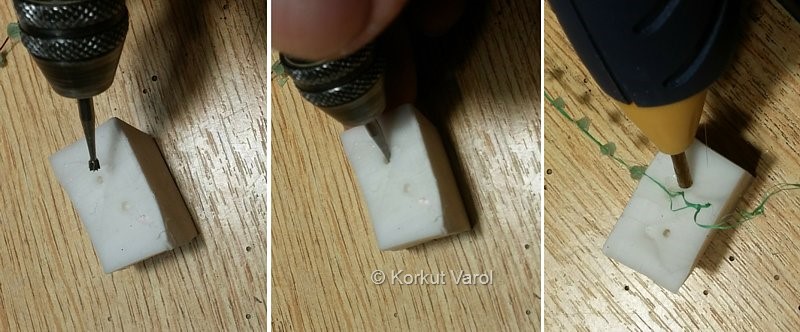
|
|
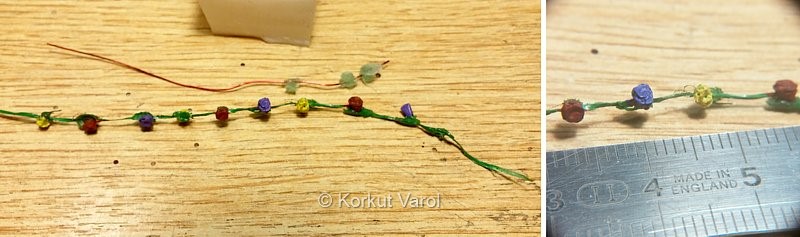
I tried with string and wire, and
painted to see better what it is like. It looks like flowers I think...
 |
|
29 October
2016:
For the pompom lining inside the windshield, I found something like this. I took off the horizontal fibres, then cut off one at each second vertical to reduce the fibre numbers. 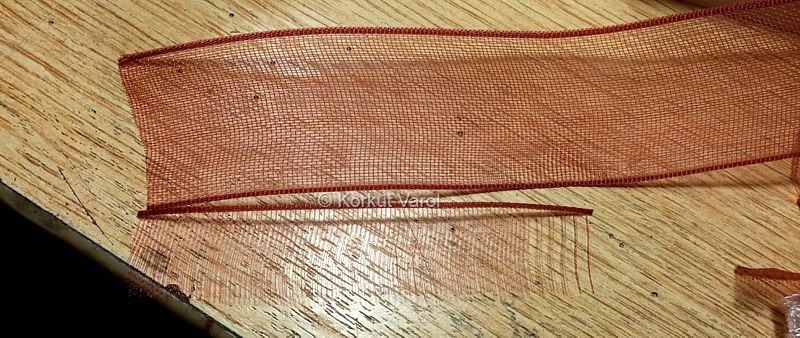 |
|
30 October
2016:
I
used a piece of masking tape as a spacer and inserted the fibres
through beads, fixed them with CA glue and trimmed the excess fibres.
Then I applied pink flocking all over and got the pompom line.
 |
|
14 November
2016:
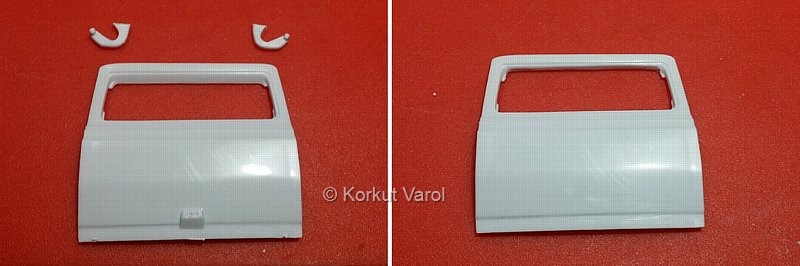
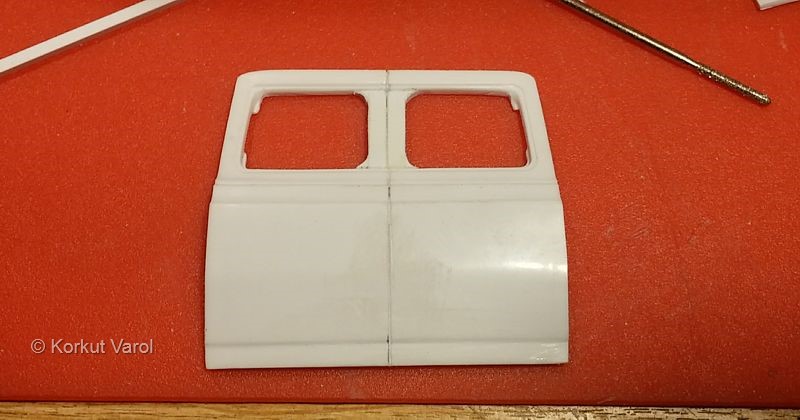
At last the model arrived. To convert the van to a minibus, first I marked the windows and cut them open. I shaved the left rear door handle. 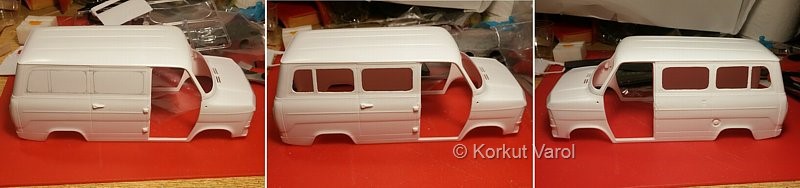 |
|
The back door would be 2-piece,
so I shaved off the hinges and the bottom side lock.
 |
|
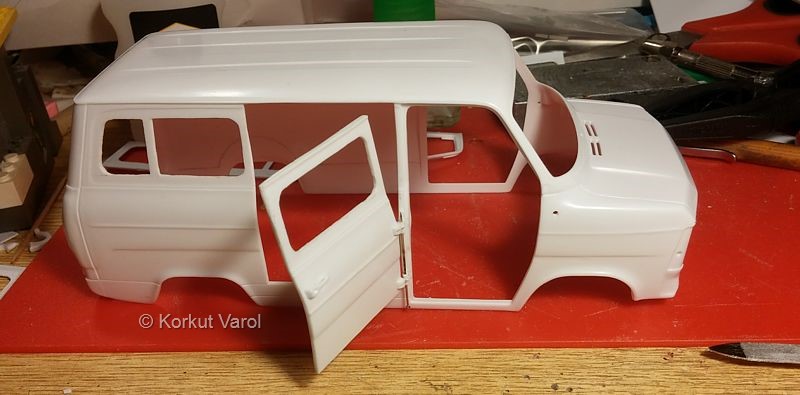
16 November
2016:
I glued the central uprights and scribed a parting line on the back door. I cut off the right rear door. 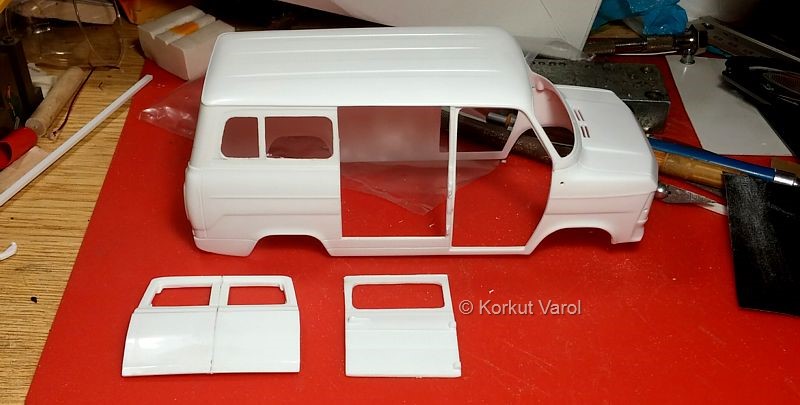
|
|
17 November
2016:
I drilled the door handle and later sanded the grabbing void on the handle. 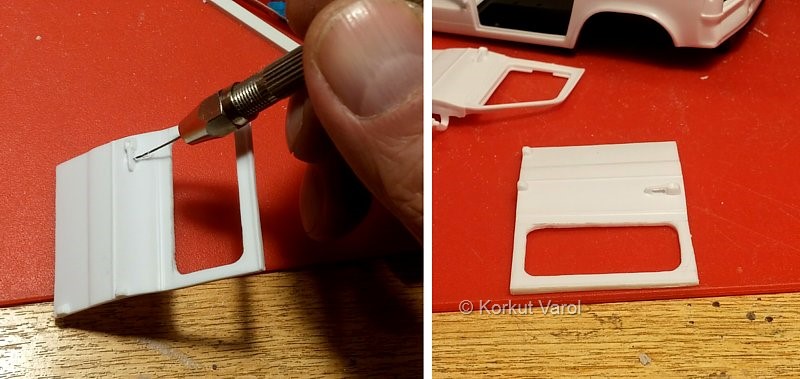 |
|
19 November
2016:
I prepared the internal frames to hold the glass parts. I rounded the edges with a radiused blade I shaped for the purpose. 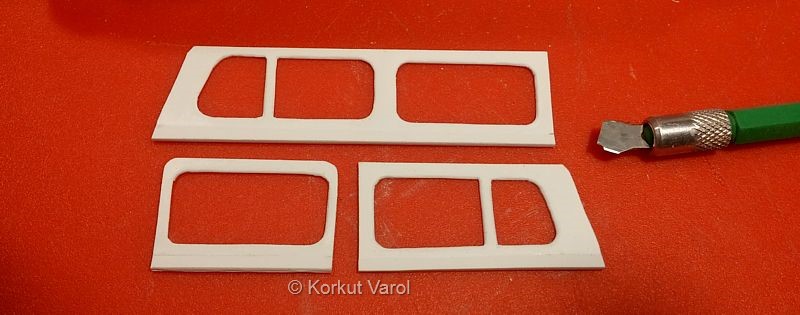 |
I made radiused parts for the
back door central uprights.
 |
|
20 November
2016:
I shaved off a layer to house the inserted acetate sheet as the glass. 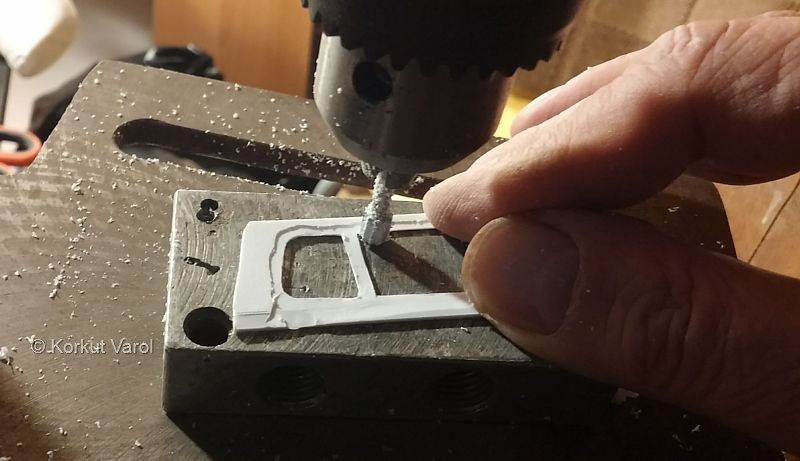 |
|
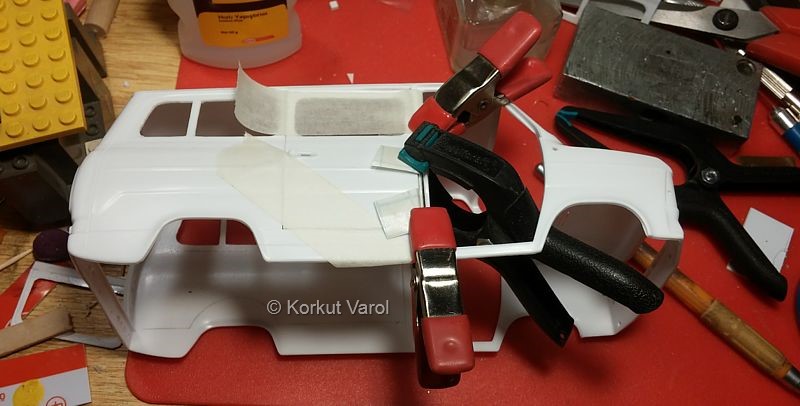
Manufacturing
of the hinging for the rear door.
I made a cut in the hinge bodies on the door. I prepared the hinge ends from brass sheet, bent and inserted in the cuts then fixed with epoxy glue. To maintain concentricity, I used a headed pin as the axis. 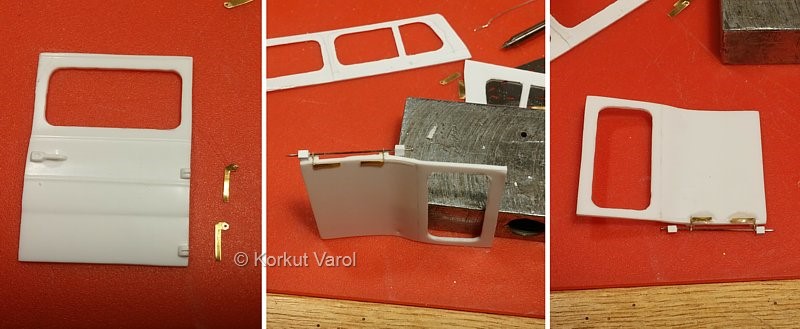 |
|
I
prepared the mating parts of the hinge on the B-post from
styrene and glued them on the B-post while holding the door in
place.
 |
|
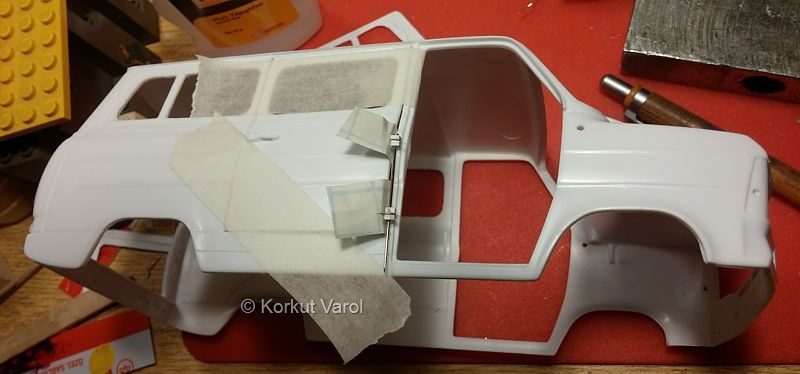
I applied
pressure on the hinges while curing.
 |
|
Checking the
operation of the door.
 |
|
21 November
2016:
There was a gap over the back doors. To cover it, I glued a piece of styrene strip. 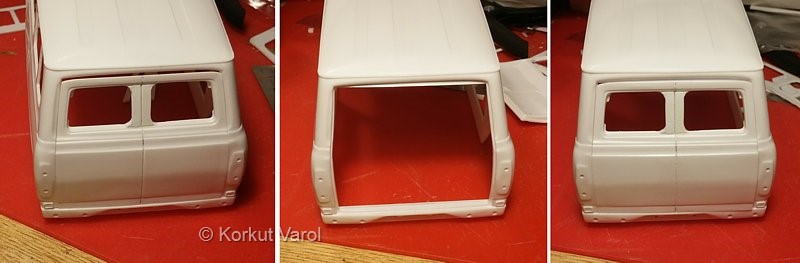 |
|
22 November
2016:
Then I applied polyester putty and sanded. 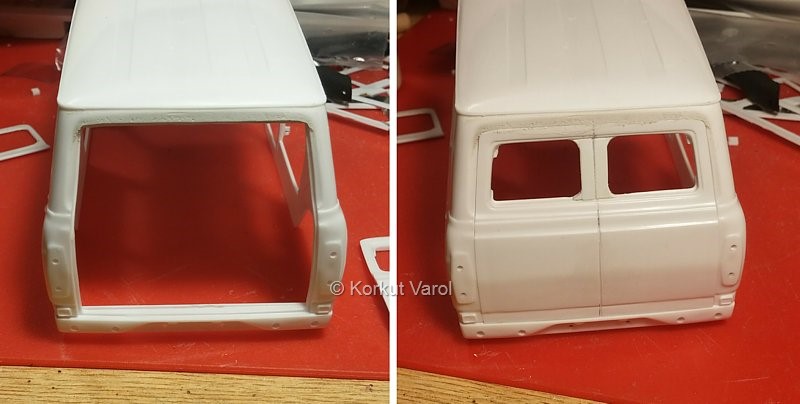
|
|
23 November 2016: I glued the inner window panels. The acetate sheet is inserted from the bottom side and pushed upwards. By this method, no residues of glass cement will be visible. 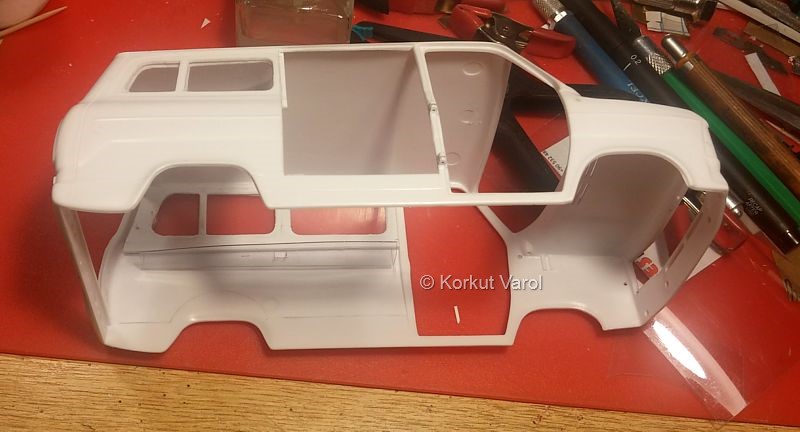
|
 ...... ...... |