 |
 |
PAGE
3 of 4
|
|
PAGE
3 of 4
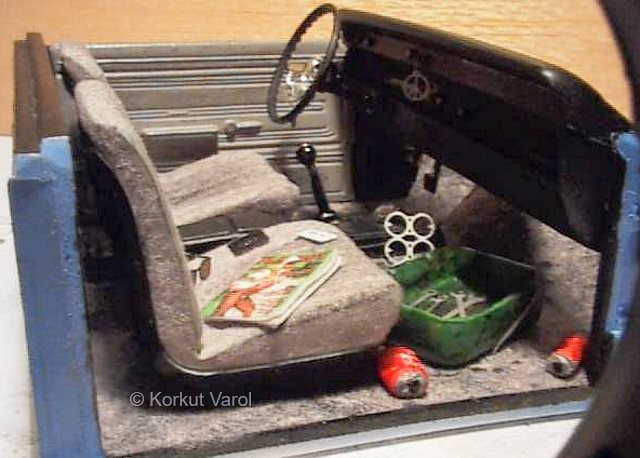
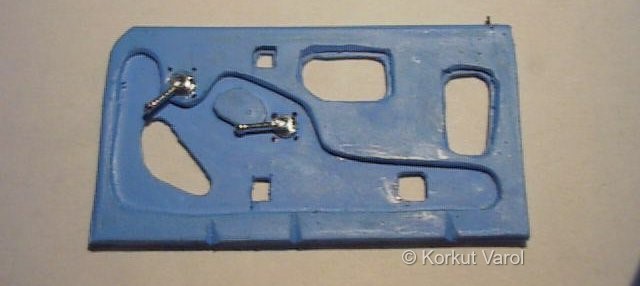
| 01 November 1999: Now for the interior matters. The floor was first painted matt black and light gray flocking applied over the wet paint and pressed on with fingers, until the flocking looked like dirtied and worn out, especially in front of the driver's seat. |
 |
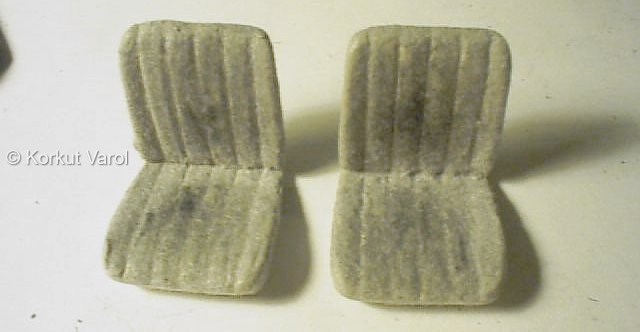
| 02 November 1999: The seats were also treated the same way as the floor. Detail Master flocking was used. |
 |
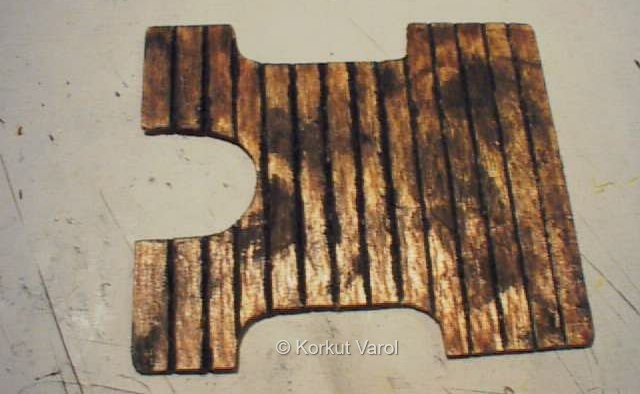
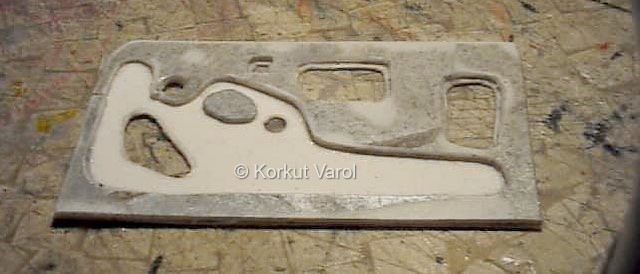
| 07 November 1999: For the floorbed, 1.5 mm balsa sheet was cut to bed template and separations between laminates were done by removing wood with the backside of a chopped-tip #11 blade. The weathering was done by rubbing the heated tip of a soldering iron over the balsa, and dropping black and brown paints on the wood, then spreading with fingertips. |
 |
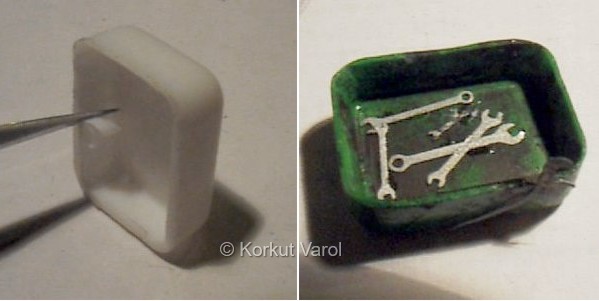
| A toolbox was proposed
to rest in front of the right seat. The end of a plastic housing of a
superglue
looked fine for the job, except for the thickness. The thickness at the
edges was reduced as shown. The pan was painted matt green and dirtied with drybrushing. The tools were taken from Detail Master Interior Junk. |
 |
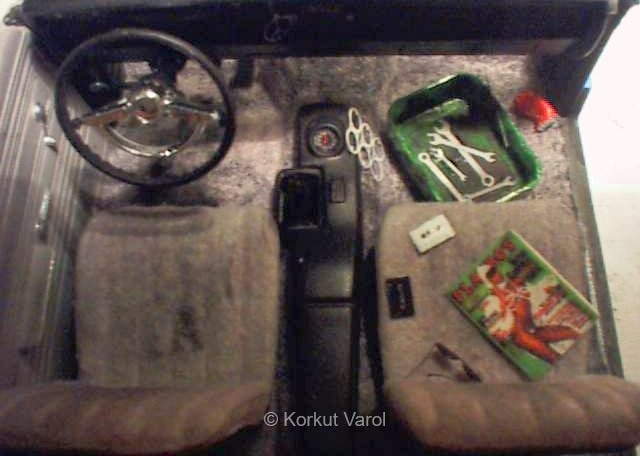
| 09 November 1999: A general view of the messy interior. Some details are on the following pics. The mess consists of two dented soda cans (Scale Eqp.), two cassettes, one sunglass, one six-pack holder, a magazine and the toolbox. |
 |
 |
|
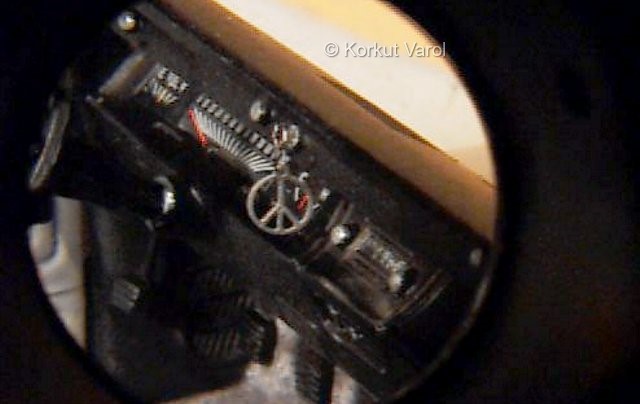
| A close-up of the key and keyholder. |
 |
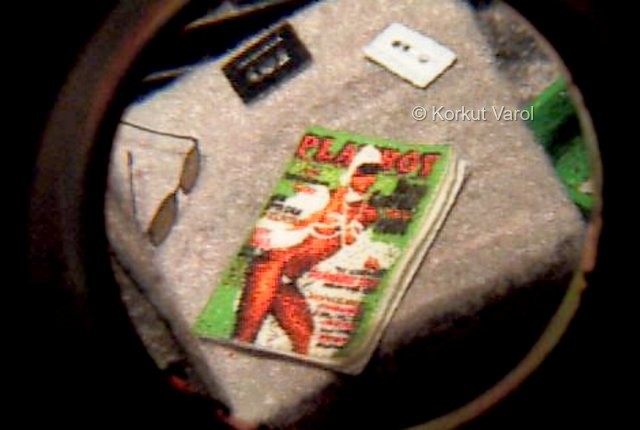
| Close-up of the right seat. The driver's reading choice was made by computer-printing the cover on paper, then pasting it on photographic paper and slicing the layers apart with a knife. The edges were also deformed to look like a read mag. |
 |
| Now to the junk
at the truck bed...
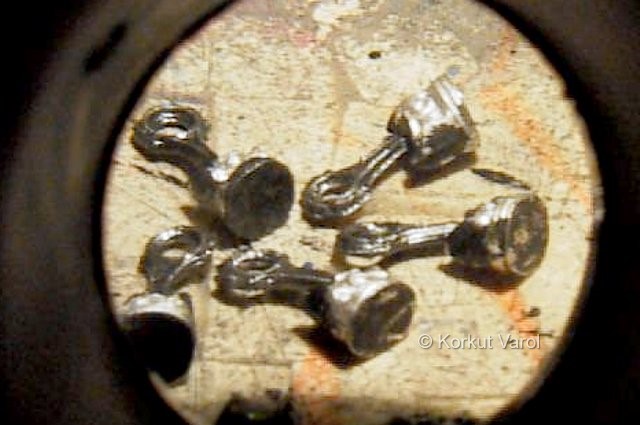
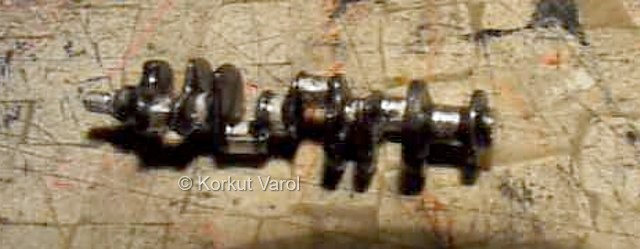
The pistons are from R&D Unique. The connecting rods are bent randomly, and given a used effect with matt black drybrushing. The conrods were painted with gunmetal. |
 |
| The crankshaft is also from R&D. It was trimmed, the throws painted with gunmetal and polished at the bearings. |
 |
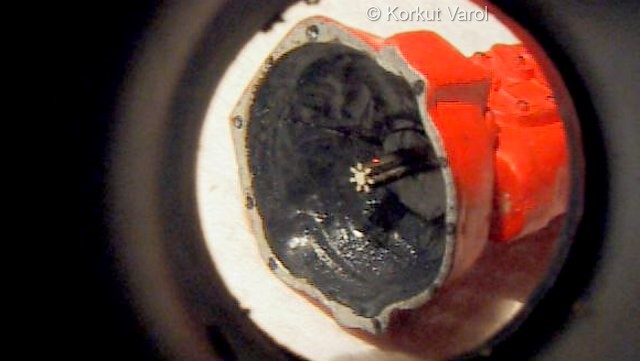
| This is the close-up of the flywheel housing of a Chevrolet tranny from my parts box. It was separated from the engine, the inside of the housing carved and walls thinned with Dremel moto-tool. Inside was painted gunmetal and a gear from a clock was put in as the end of the splined shaft. |
 |
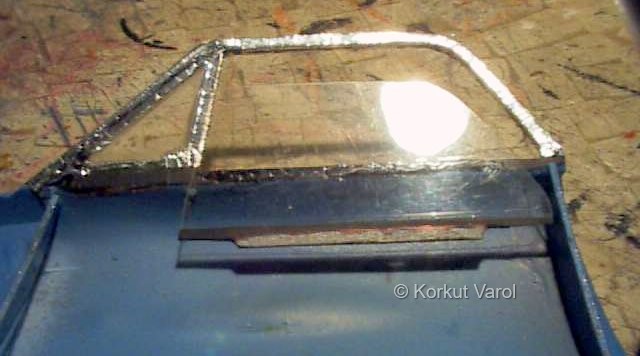
| 17 November 1999: Then it came to my mind that the opening right door need not have the internal trim panel. So I began searching for the stamped steel panel pics, and thanks to the Elky restorers, I found pics in their web sites. So I cut two layers of styrene sheet and pasted them on one another. |
 |
| 18 November 1999: I painted the new panel and glued scratchbuilt door and window handles on. |
 |
| The glass was cut from acetate sheet and its bottom painted as if it were being held by the steel bracket. The glass was glued to the door at this position. |
 |
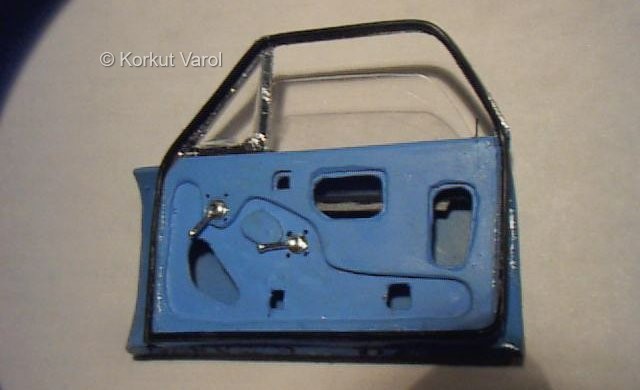
| 19 November 1999: Now the inner panel was glued in place, and door seals made from insulated copper wire glued in place with CA glue. Note the door lock pin cut from DM ignition wire, with a drop of CA glue at the tip. |
 |
| The cage was constructed from the frames of parts trees. The net was cut from the mesh used in wall plastering applications. |
 |
 |
|