 |
 |
PAGE 2 of 4
|
|
PAGE 2 of 4
| Now, giving a little
break to the body, the crane construction:
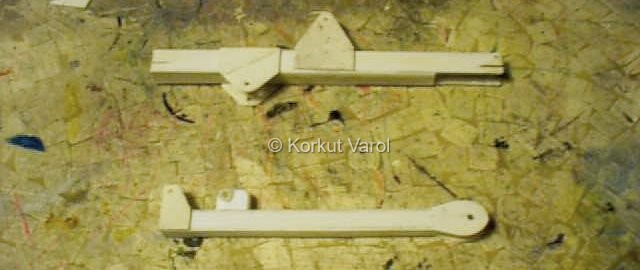
The geometry was studied on paper first, then manufacturing began. The booms were made from sheet styrene and all the brackets etc. were glued on. |
 |
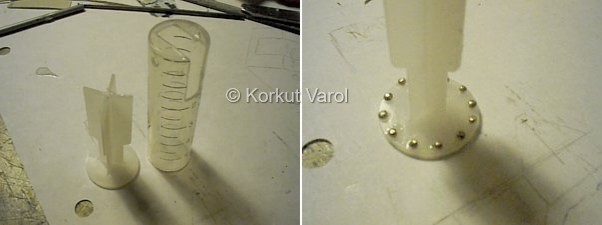
| 18 October 1999: For the rotating body, an injection syringe seemed very suitable. After the necessary cutouts, the pedestal was given 12 bolts to fix it to the reinforced chassis. The bolts were made from pin heads. |
 |
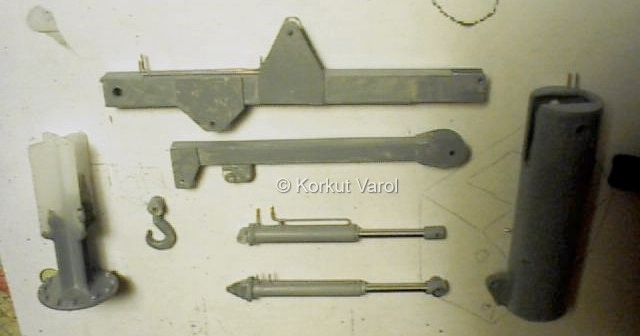
| Crane parts before assembly. | 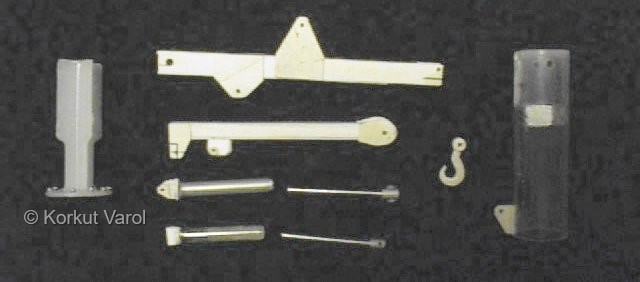 |
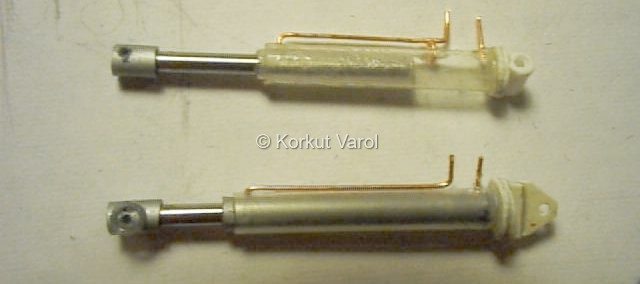
| Now the hydraulic pistons and cylinders. The rods were from steel bar, 2 mm dia., and polished by turning against 1000 grit sandpaper. The cylinders and inner tubes are from ball-point refills. The inner tubes are given small deformations so that they exert a squeezing force on the rods. In this way, the booms may be positioned in any desired angle with a small load hanging. The hydraulic pipes were made from copper wire, and the brackets from styrene sheet. |
 |
| These are the parts of the crane with primer paint applied. The hook was hand-carved from styrene. |
 |
| The crane assembled waiting for the hoses. | 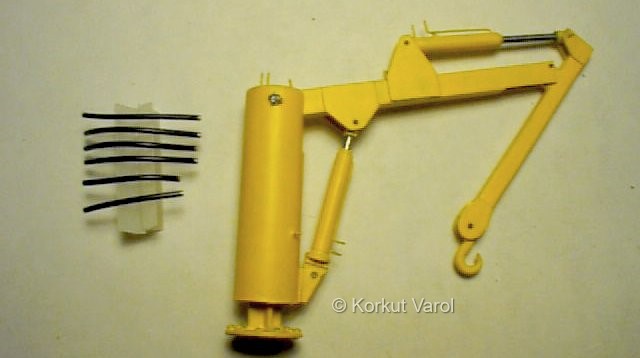 |
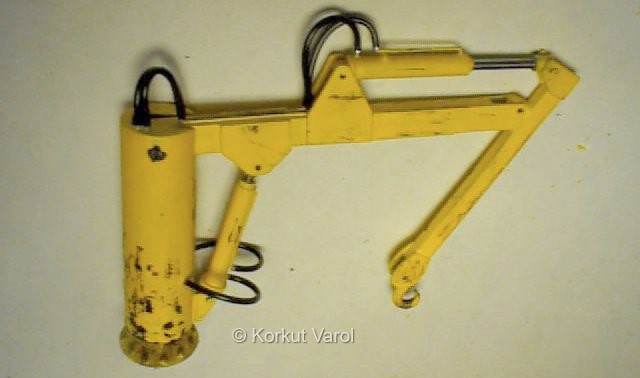
| The crane in assembled and weathered form. The hydraulic hoses were made from wire insulation, their ends painted to resemble unions. Dry brushing was used to simulate scraped-off paint. |
 |
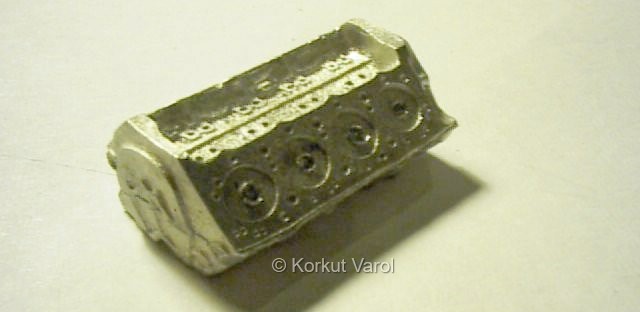
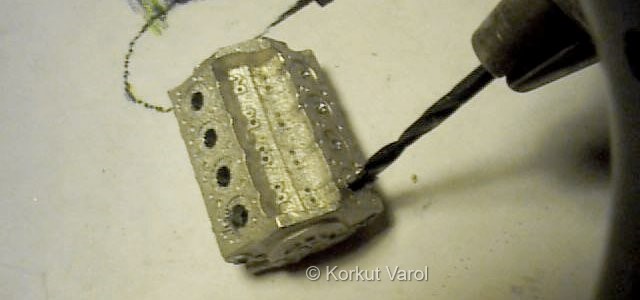
| 23 October 1999: Now a jump to the junk accessories. One item was a 350 V-8 block from R&D Unique. But this was raw as seen (I took the photo after drilling the first set of holes) and should be made to look realistic. So I began to drill the cylinders first. |
 |
| The cylinders were drilled in increments, the metal was too tender for any mistreatment. |
 |
| After the cylinders, the water and oil channels were drilled, as well as the pushrod holes for the valves. Then the top was filed to smooth as shown. |
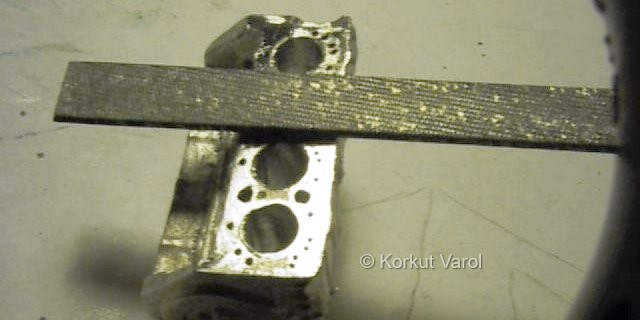 |
| Other machined surfaces were filed to smooth as well. |
 |
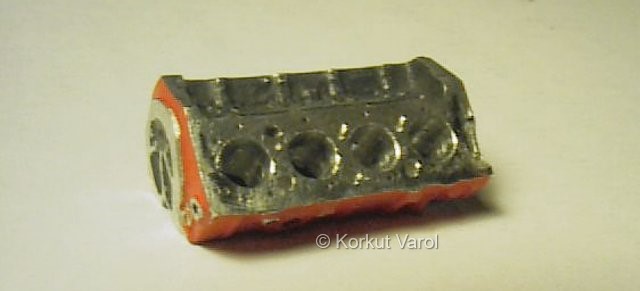
| Then the block was painted in Chevy red. It would be made dirty afterwards. |
 |
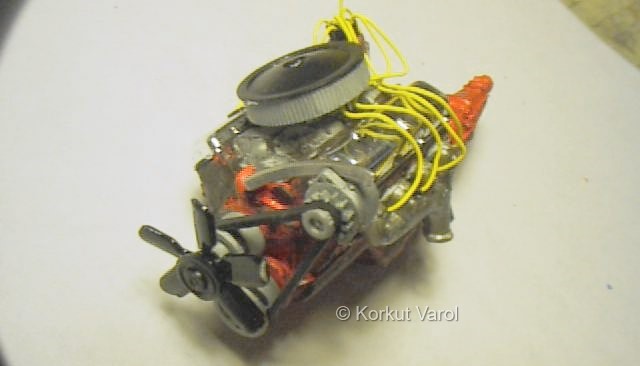
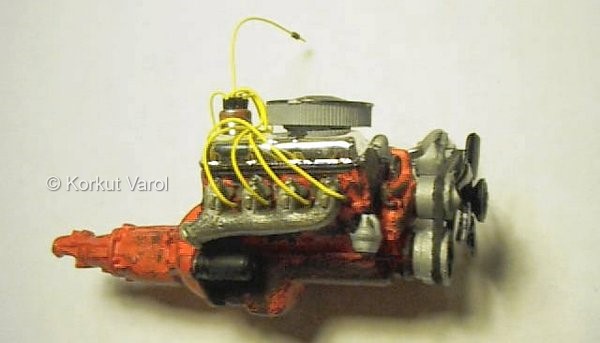
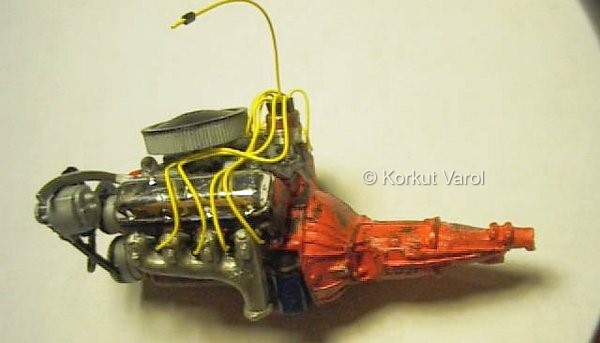
| 25 October 1999: Now I assembled the engine, installed the ignition wiring and made some dirtiness here and there. |
 |
 |
 |
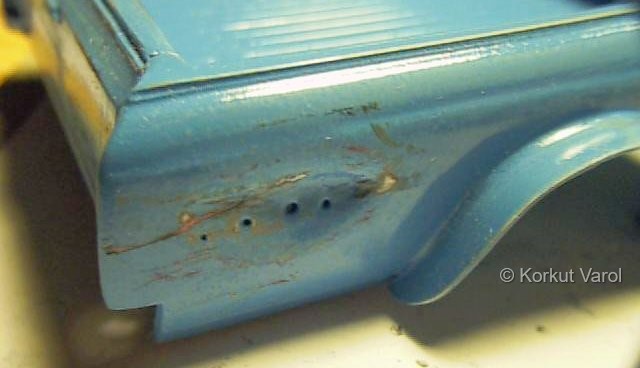
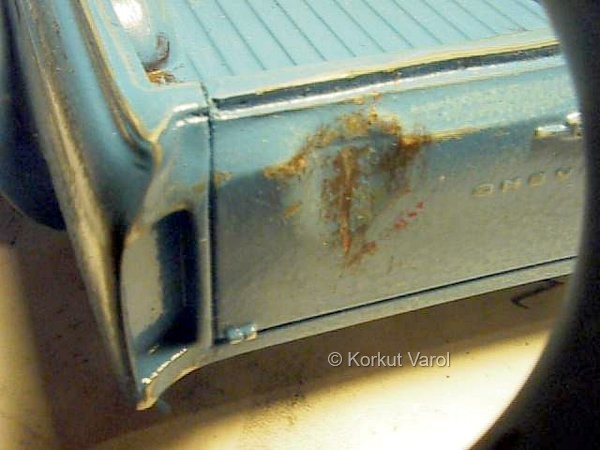
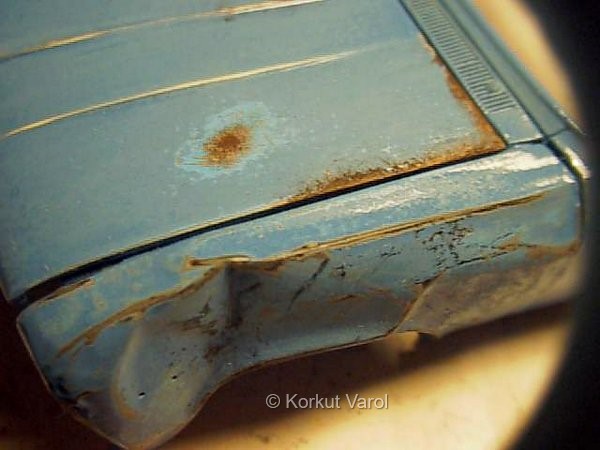
| 31 October 1999: And now back to the body and weathering. Before the primer, places prone to rust were painted dark brown (Model Master 1583 - it says it's rubber but looks more like rust.) After the primer, matt flat light blue (Model Master 1562) was applied, and as the final coat, gloss light blue (Humbrol 47) was sprayed. After curing, the final paint was dulled, and where necessary, sanded further with 1200 grit sandpaper, to recover the different undercoat, the primer, or the rust. This is the view of the truck bed. The bottom was not treated, since it would have a wooden bed to cover it. |
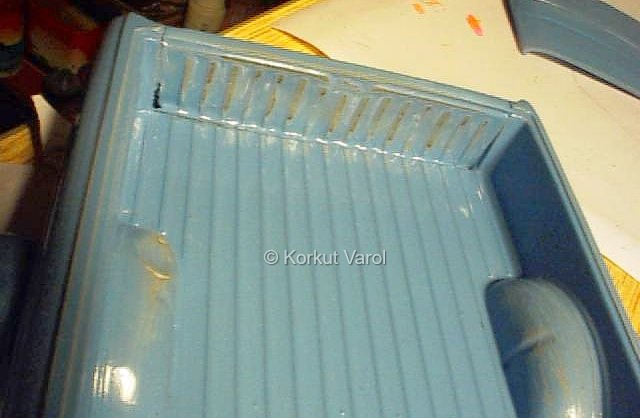 |
| The following three pics are some close-ups of dents and weathering. |
 |
 |
 |
 |
|