 |
|
 |  |
REPLICA OF THE RALLY CAR IN 1977 LONDON-SYDNEY RALLY, TEAM TURKEY.
.
Started: 29 October 2005
Finished: 03 May 2009
Page 6 of 9
|
|
|
| |
Page 6 of 9
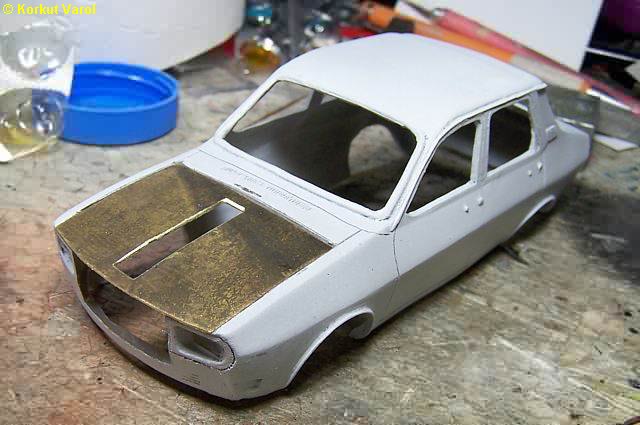
| 03 April 2009:
I cut out the hood and the whole area in front of the radiator (as in the real car). |
 |
| I did not want to deal with resin for the hood, so I decided to manufacture it from 0.70 mm brass sheet. I tailored the part and formed it to the curvatures of the body. To depict the formed part at the center, I cut it off. |
 |
| I
cut a strip from 0.3 mm brass sheet
to fit in the recess of the hood.
I pre-soldered both parts all around to prepare for the joining. |
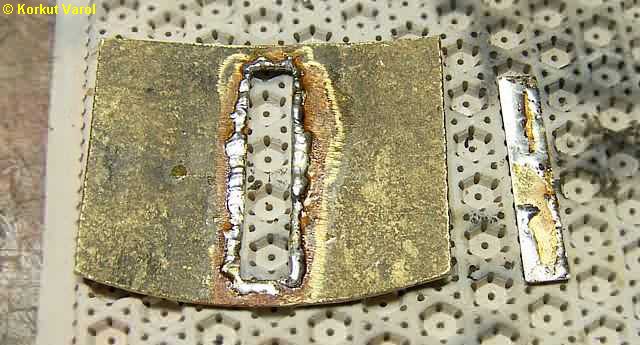 |
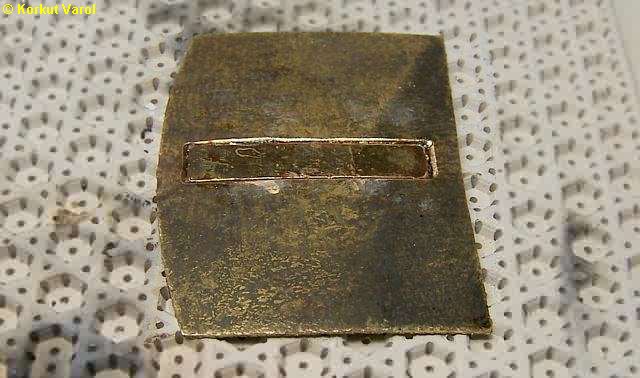
| I soldered the central part flush with the inside of the hood, so that the pressed form rectangle was depicted outside. |
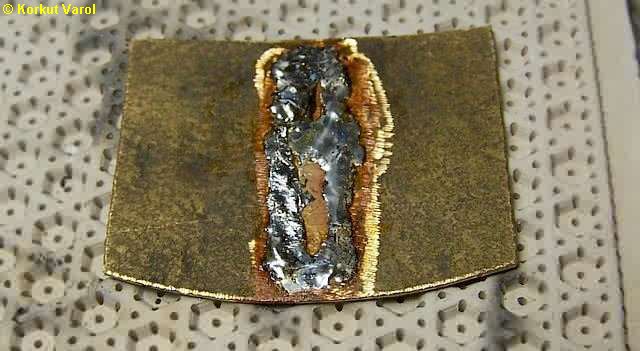 |
| This is the raw hood... |
 |
| 05 April 2009:
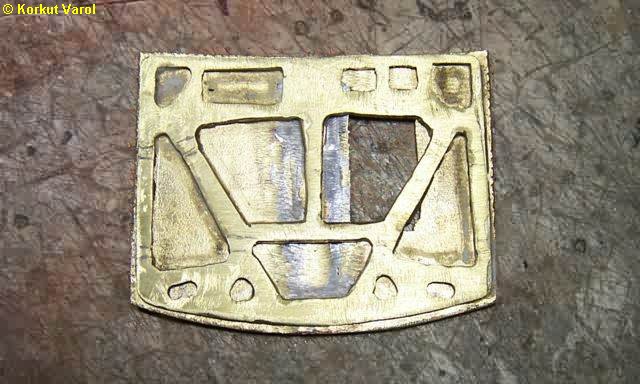
I began to cut out the hole that serves for under-hood heat rejection. Also, I drew the underhood reinforcement on the computer, printed, then stuck it on 0.7 mm brass sheet with double-side adhesive. I drilled the pilot holes for the cutouts. |
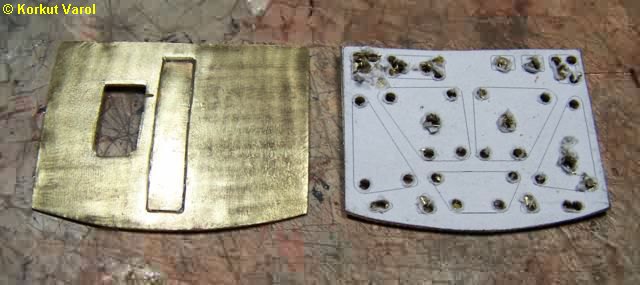 |
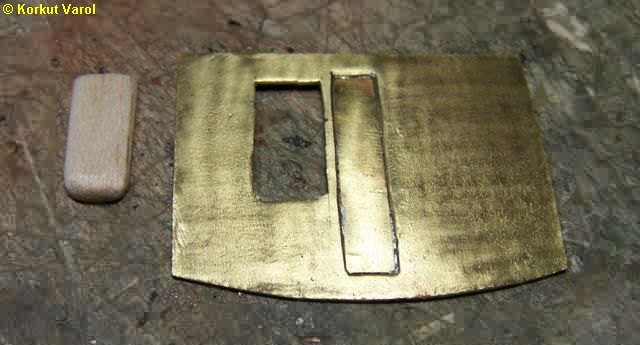
| I completed the discharge hole, and prepared a master for its cover from balsa wood. |
 |
| I finished the reinforcement and glued the two parts with CA glue. |
 |
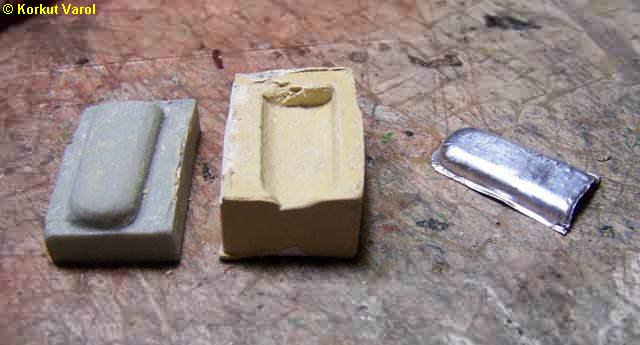
| To manufacture the cover, I had to make a male and a female die. First, I made a mold of silicone, from the balsa master; and made the resin male die (left). Then, using a mold seperator fluid, I applied automotive polyester putty on this male and formed the female die. I put 0.1 mm thick aluminum foil in between and made a "pressing". To add strength, I applied CA glue on the inside with activator. I cut off the rear surface and trimmed the peripherals. Now the cover is ready to be glued on the hood. |
 |
| 06 April 2009:
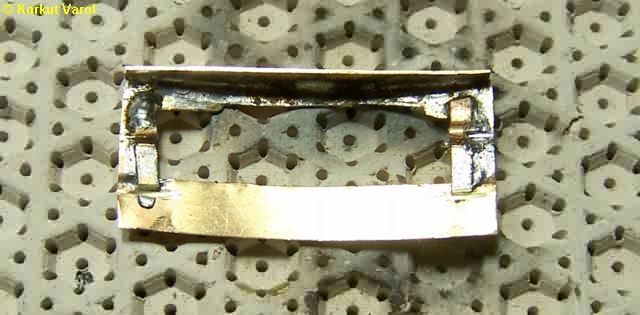
To make the hood open, I manufactured the front central panel/frame from 0.3 mm brass sheet and soldered housings for the hood hinges. |
 |
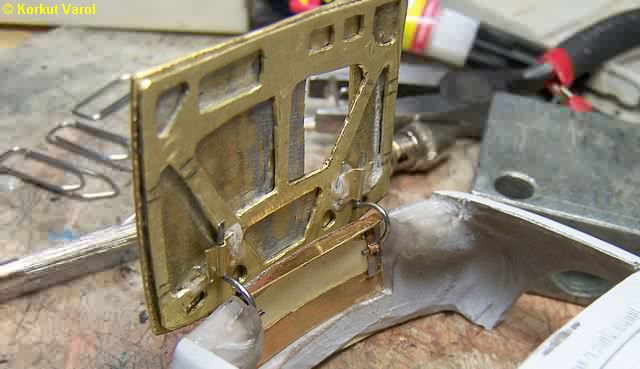
| After a whole day's trial and error attempts, I managed to manufacture a pair of properly working hinges. I made a pair of housings for the hinge wire under the hood, and fixed them with CA glue. Not 100% realistic, but still better than a non-opening hood... |
 |
| 07 April 2009:
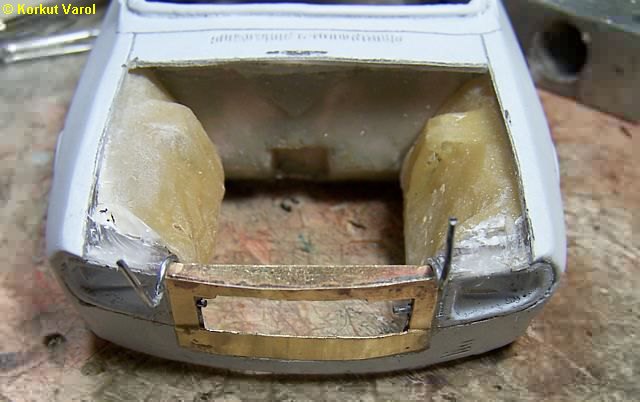
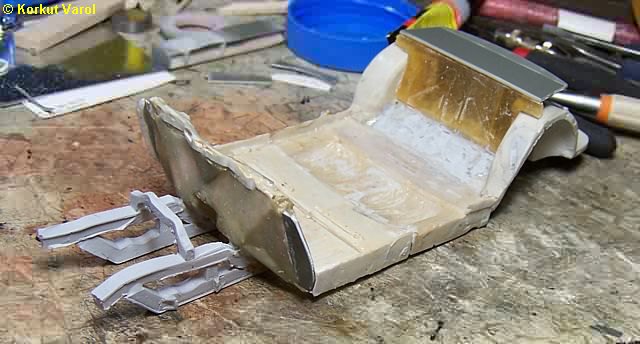
I installed the inner wheelarch panels with CA glue. |
 |
| 09 April 2009:
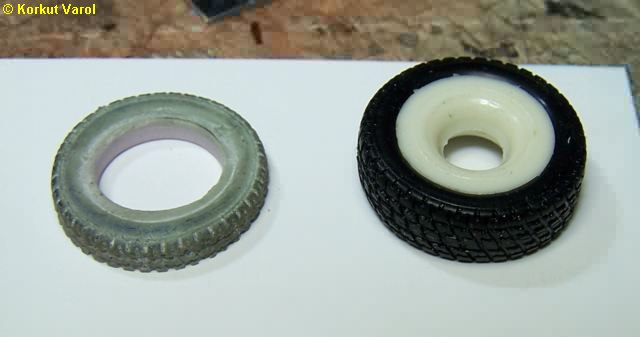
The tire that I had cast previously was a little small in scale with the car. So I began searching for a new suitable tire. I found a diecast Citroen C3 model, the tires being good in outer diameter but wider than required. Also the aspect ratio was lower than the needed. However, the tread pattern had large teeth, suitable for a rally car. So I went on making a new tire, using the rubber one. First I inserted a suitable part inside, then made a silicone mold from this and cast a half tire from resin. I had the part turned to 15 mm diameter at the inside and cut at half the tire width. Now this will be the master for the new half-tire mold. |
 |
| 10 April 2009:
I made the luggage compartment seperator panels from resin and plastic. I also glued the front chassis arms to the floor and firewall. |
 |
| 11 April 2009:
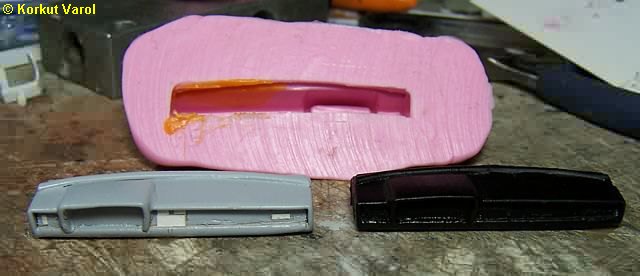
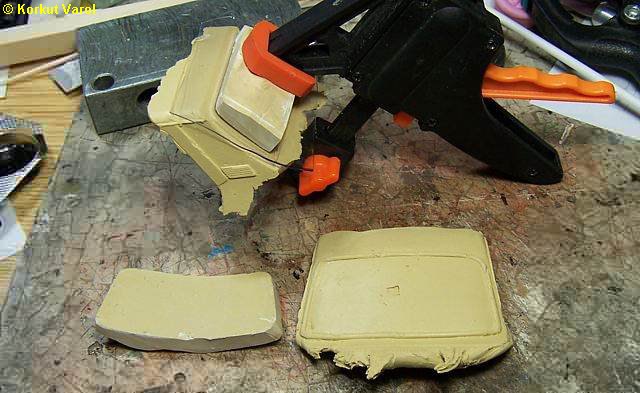
I made the master for the dashboard (left) from balsa and styrene sheets. Then I made a silicon mold and got a resin copy (right). |
 |
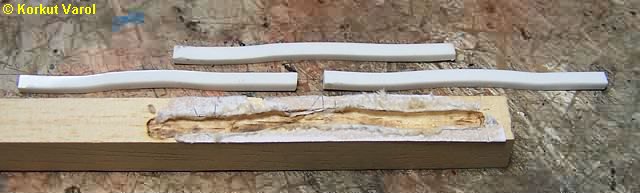
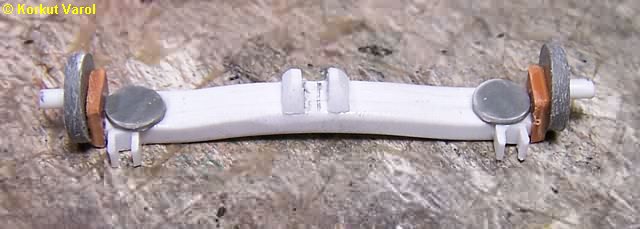
| For the rear axle, it was impossible to bend a wide profile section. So I thought of forming the whole by layers. I used 3 rectangular strips to make for the width of the beam. I drew the rear axle profile on a piece of wood and cut a shaping master channel with my Dremel. I used a heat gun to form the strips in the channel. The formed strips were glued to make the raw beam. |
 |
| 12 April 2009:
I manufactured other items on the rear axle from styrene sheets and completed the item. |
 |
| 14 April 2009:
For the glasses, I copied one male and one female sections from both the front and rear windows, of automotive polyester putty. I used the pairs as dies for acetate, After pressing with a clamp, I applied heat from a heat gun to form the windows. |
 |
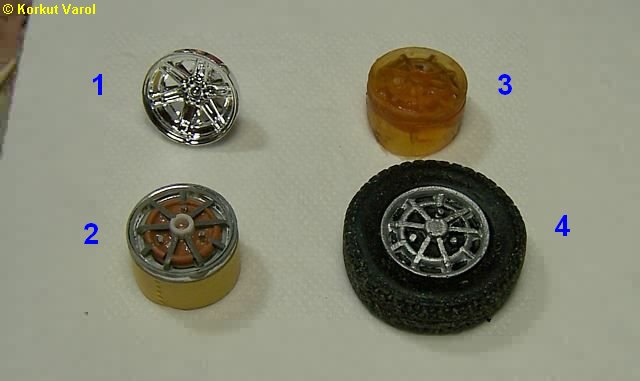
| One
of the toughest deals was to manufacture
the wheels.
(1) I founda a suitable diameter wheel from my parts box. (2) It took me two days to make the central parts from styrene sheet as the master. Then I made a silicon mold. (3) The cast resin raw wheel (4) The complete wheel and tyre as painted. |
 |
 |
|